
Create your first Pester script to test a DSC resource
Maybe you already took a look to my previous post about Pester, Git and PowerShell interraction… If not, you really should before read this one. I won’t re-explain why it’s important for your work to use them, now, i will talk about how use them together to get your work done.
Actually, i will only talk about Pester utilisation because, you’ll find a huge amout of very good posts using Bing, that’ll talk better than me how to use Git on Windows and push (or not) your stuff on the internet to backup it, or better, share it to the community !
Indeed, this part is very important in the process where you are bringed if you read this post, with DSC, everything is resource, and you can’t script all stuff, you can easily embrace the power of this community and find your pleasure on github (using PowerShell.org or Ravi for example) repositories to fork/clone them on your internal repository in order to publish them. I know this is fully true because there is the PowerShell gallery coming up and you can also create a repository and use Install-Module to download if. But, in your company, your repository will be initiated by a folder maintened by Git to handle the team working and/or versionning !
I might be wrong, but this is how i do in my work now that we are using chef to orchestrate our systems configuration.
So let’s go back to Pester.
In a perfect world, your DSC resource is fully working at first time, your colleague have done a good job on this project (yeah, you never do mistakes in your scripts) and all commits went smooth, so now how do you test it ?
Do you load manually the scripts and play your tests manually ? OK, how much time does it consume ? Pretty much i guess.
This is where Pester comes into play, like i said in the previous post, if you made your pester script before, you’ll just have to execute it, and each time you commit a modification into production, you just have before, to execute pester script in order to validate it.
I know you start thinking about how much time i could spend doing awesome stuff like drinking coffee or chat with colleagues ! Here is how you create your first Pester script for testing a PowerShell DSC resource.
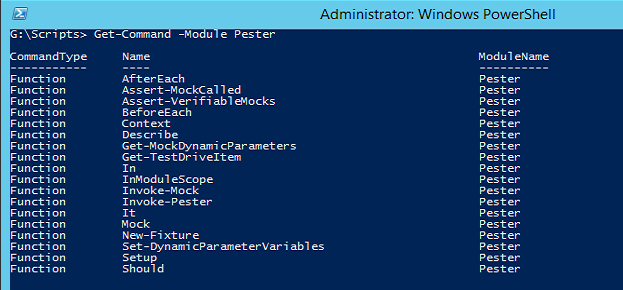
First of all, let’s look at how commands are included in this framework :
First of all, let’s look at the New-Fixture cmdlet which will permit you to create the skeleton of your Pester script quite easily 🙂
Get-Command New-Fixture –Syntax
New-Fixture [[-Path] <string>] [-Name] <string> [<CommonParameters>]
So let’s try execute something like that 🙂
New-Fixture -Path SomeExample -Name Test-Pester
    Directory: G:\Scripts\SomeExample


Mode                LastWriteTime     Length Name
----                -------------     ------ ----
-a----       11/29/2014  10:27 AM         32 Test-Pester.ps1
-a----       11/29/2014  10:27 AM        262 Test-Pester.Tests.ps1
And now, let’s have a look about how the skeleton of the Pester script is :
$here = Split-Path -Parent $MyInvocation.MyCommand.Path
$sut = (Split-Path -Leaf $MyInvocation.MyCommand.Path).Replace(".Tests.", ".")
. "$here\$sut"

Describe "Test-Pester" {
    It "does something useful" {
        $true | Should Be $false
    }
}
The first two lines exist in order to execute the script in the Pester framework. Now, look at Pester functions
- Describe : This is a block to describe (hmm) all the ideas behind all tsts in it.
- It : Actually this is this function which launch the unit test
- Should : Should will get the result of the command in the left side of the pipe and if the result match the value after Should be, Pester will return a success.
This is why Pester is a strong test framework. Because you can test everything you want in your script, but you can imagine also test a full system and validate it (or not) !
The more your script is powerfull and complex, the more tests are important and a must have.
Let’s take a look at a little DSC resource i’ve made, the psm1 file from the module looks like that. How do we test the 3 functions ?
So the first thing is to create a pester script in the same directory as my DSC resource module.
The main problem here is that even if you rename the psm1 file to ps1. Another problem is the Export-Modulemember, but you’ll see Pester has everything in his framework to help us. For tests, ill take my cSNMP Community resource and the Pester test file from github here.
Describe "Test DSC Resource execution" {
    Copy-Item "cSNMPCommunity.psm1" TestDrive:\script.ps1 -Force
    Mock Export-ModuleMember {return $true}
    . "TestDrive:\script.ps1"

    It "Test if the Get-TargetResource return a hashtable" {
        (Get-TargetResource nagios).GetType() -as [string] | Should Be 'hashtable'
    }

    It "Test if the Get-TargetResource return true or false" {
        (Test-TargetResource -community nagios -Right ReadOnly -Ensure "Ab-sent").GetType() -as [string] | Should Be 'bool'
    }
}
We use the Mock command to bypass the Export-ModuleMember error. We also copy the psm1 file to the TestDrive by renaming the file in order to give the possibility to Pester to launch it. So you just have to execute it and your script is (not fully) validated… Actually, i’ve just tested that a hashtable is return ed from Get-TargetResource and if a boolean is returned from Test-TargetResource, but you now have the idea how to do this work !
In order to get the work done, just run into the directory where your two scripts are located, and execute
Invoke-Pester
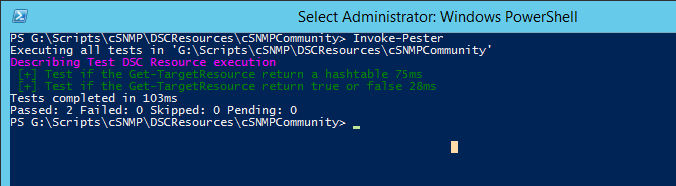
Everyting seems find, and you can now commit your changes and go into the next task on your todo list !
The next part of this serie, will talk about integrating DSC, Pester & Chef… The futur is coming 🙂


Very interesting Fabien. So basically Pester can only validate types that are returned ? When launched, is the script ‘really’ executed? (like if a test an OU deletion script… ;))
Like said in the article the script is executed 😉 And you can test everything that is a string, if a throw is returned even booleans.. The Pester wiki is pretty interesting 😀